I've been planning to do this post for the longest time, but then I got busy with work and it never happened. So now that things have slowed down (a little), I'm finally getting around to doing it. So I've been wanting to show you how I finished my butcher block countertops. If you haven't seen it already, you might want to take a peak at the whole kitchen makeover which you can find here.
So first a little background. As I mentioned in the earlier post, everything in the kitchen is from Ikea. I had been planning to get oak butcher block, but when it came time to do the kitchen, the oak was out of stock. I didn't have time to wait for them to restock, because the contractor was ready to go and it was now or never. So I ended up with the beech countertops. Here's what they looked like.
I was really hoping for something darker that would be a nice contrast with the white cabinets and backsplash. I knew I'd have to finish them off in some way, but I wasn't sure how to go about it. I did a lot of research online. Many people recommended Waterlox, but here's the deal. The counters were already installed. I would have had to finish them in place and everything I read about Waterlox suggested that this was a project to do in the garage, not the kitchen. So I started looking into alternatives. Hey, how about stain and poly? But, one of the things that stumped me was the whole food-safe-finish issue. Then I started thinking it through. I don't prepare or eat food directly on the counters. Your average dining table is finished with stain and poly. How is this any different?
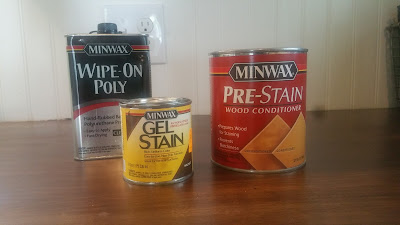
So then I started researching the stain and poly angle. The problem with beech is that is a soft and porous. I was worried about the stain looking blotchy. I finally decided to use a pre-stain conditioner, followed by gel stain, and finishing off with a wipe on poly.
The process was relatively simple.
- I sanded the countertops using a palm sander. Then I wiped everything down with a slightly damp rag to get rid of any dust or debris.
- I applied the pre-stain conditioner with a foam brush and let it dry according to the directions.
- Then I brushed on a coat of gel stain in Walnut. Now if you've never used gel stain, you should know it's different than other kinds of wood stain in that it doesn't soak into the wood as much as other stains. It's more like a translucent paint than a true stain. Do one section at a time and wipe off the excess before it dries.
- After letting the stain dry for 24 hours, I put on 3 coats of clear gloss wipe-on poly, letting each coat dry 12 hours.
The finish has held up beautifully. I highly recommend this method.


