Wednesday, December 18, 2013

Natural Christmas Centerpieces: Tutorial


Hello everyone! Today I put together a tutorial on how to create two different holiday centerpieces using natural materials. You can use containers you have around the house. The rest of the materials are either very inexpensive and/or if you're lucky, can be found in your yard.


General Supplies

1. Evergreens. I purchased two mixed bundles of greens ($5 each) at the grocery store. Since I live in the city, I don't have access to evergreen trees that I can trim. Fortunately, I happened to be walking by the park in my neighborhood and discovered that the city had decided to trim all the evergreen trees in the park, but hadn't gotten around to picking up the branches. Score! I grabbed armfuls of white pine and spruce (?). The spruce was great because it was full of cute little pine cones. In any case, whether you purchase or "recycle", look for variety in textures and colors. When you get them home, the greens need to be cut into workable-sized pieces. 


2. Berries. I didn't have access to real berries like holly, so I purchased 7 stems of red berries from Jo-Ann. All their Christmas florals were 70% off. I got these for 60¢ each.


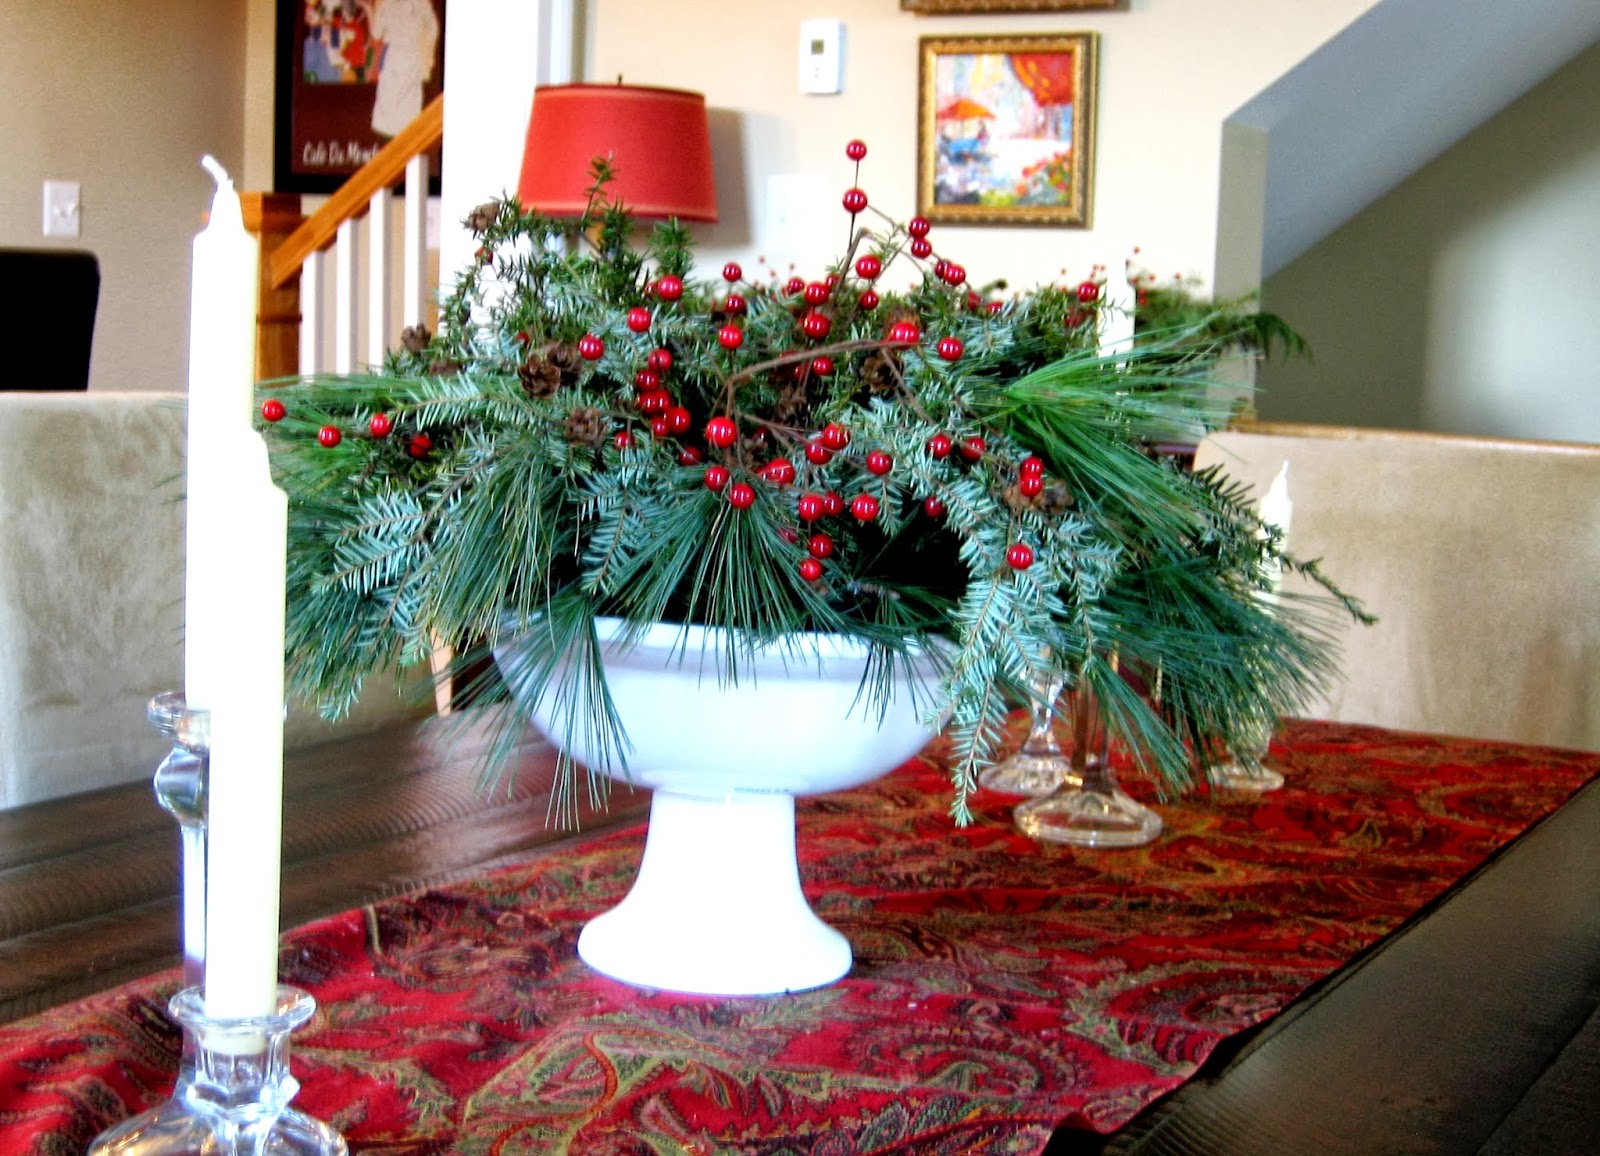
Project 1: Footed White Bowl

I used a white fruit bowl, similar to the one shown here that I purchased at Home Goods last summer. For this project,  you will also need a 5" floral dry foam half ball ($4) and some floral tape ($3.50). The half ball will give your arrangement a pleasing shape and will hold the greenery in place. 


Step 1: Place the half ball in the container and secure it in place with the floral tape. I criss-crossed pieces of tape across the top of the half ball to hold it down. 

Step 2: Next, take pieces of white pine and insert them around the perimeter of the bowl until it's completely filled in around the whole rim. It will look kind of odd at this point, but don't worry. 


Step 3: Now fill in the middle with pieces of spruce. It looks a lot better now, doesn't it?


Step 4: Finish it off by adding some berries (you will probably have to cut down the stems a bit). Then go back through and fill any gaps with additional sprigs of white pine and spruce. And that's it!


The total cost for this project (not including the bowl) was $9.30.


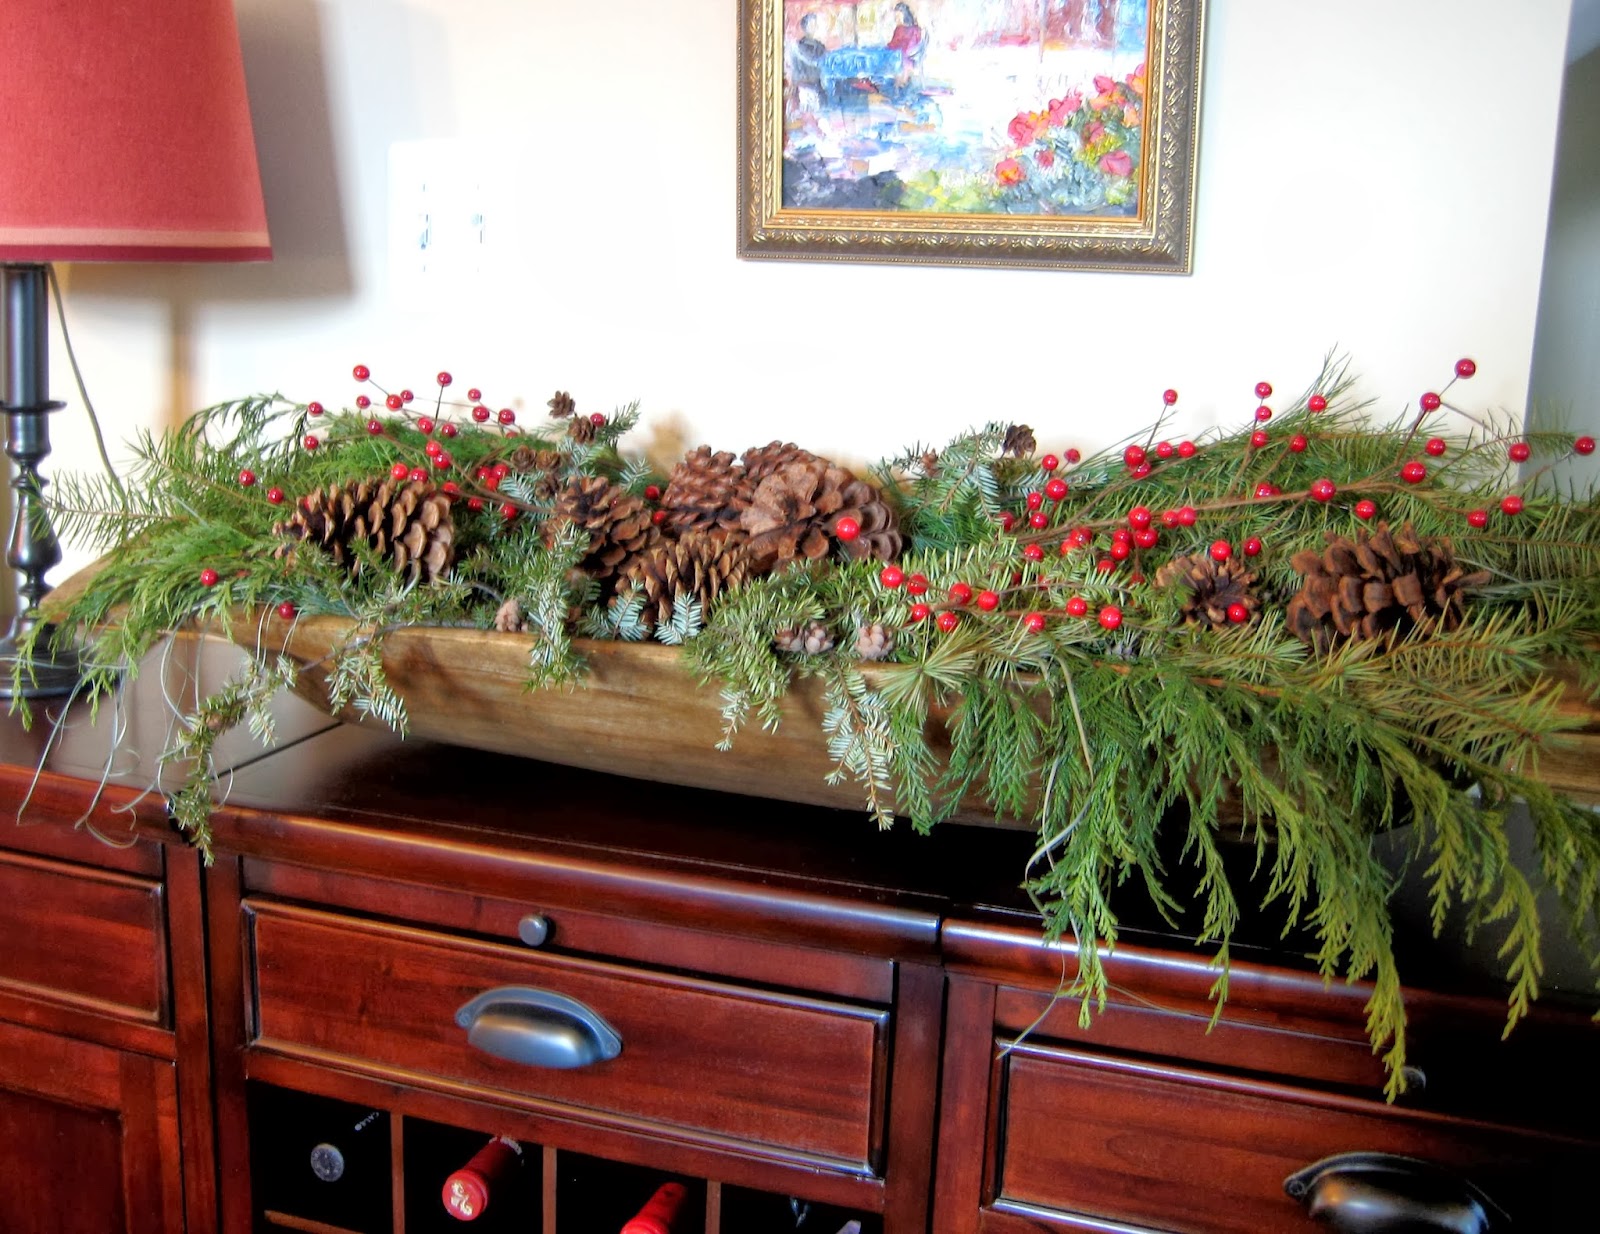
Project 2: Wooden Dough Bowl

I decided I had to have a dough bowl this year. I found a shop that had loads of them and the largest ones were on sale. I was jazzed. Now the only downside to having a really big dough bowl is it takes a LOT of stuff to fill it. Mine is 38" x 15" and about 5" deep. Now I see why they were on sale...


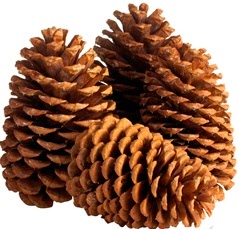
For this project, in addition to the general supplies mentioned above, you will need two mixed evergreen bouquets and some regular size pine cones. 


Step 1: I realized that the secret to dealing with a large dough bowl is to use some filler underneath the good stuff. So you will need several gallon-sized zip lock bags, some old newspaper, and some dark green fabric or tissue paper. For a dough bowl this size, I suggest 3 zip lock bags. Crumple up some newspaper into balls and then stuff 3 or 4 of these into a zip lock bag and seal it. Place several newspaper-filled baggies in the bottom of the dough bowl to form a layer. Cover the baggies with green fabric or tissue paper. I used 3 green cloth napkins. 


Step 2: Take the evergreen bouquets. Remove the wrapper, but don't take off the rubber band holding the bunch together. Slide the rubber band down the stem as far as possible, then fan out the branches. Place one bouquet on each side of the bowl with the stems overlapping in the center. 


Step 3: Arrange some pine cones in the center of the bowl, covering the spot where the bouquet stems overlap. Distribute the rest of the pine cones throughout the arrangement.


Step 4: Take some additional cut greens and fill in any bare spots. Then add in some of the berry stems to finish it off. Done!


The total cost for this project was $12.40 (exclusive of the dough bowl and pine cones which had been purchased previously).

Happy holidays!


Tutorials and Tips Link Party button

© Salt Marsh Cottage 2013

Sunday, December 8, 2013

A Very Vintage Christmas: How to Get the Look


I love the look of vintage glass Christmas ornaments. This year, for the first time, my tree is outfitted entirely in vintage and vintage-looking glass ornaments. It's a mixture of my favorite old pieces supplemented with new ornaments that mimic or complement the look of the originals.  Keep reading for a rundown on how to achieve this look without breaking the bank.


I think it's important to mix things up. I intermingle sizes, shapes, colors, and ages to create visual interest. For example, in the picture below, there are ornaments of various sizes, shapes, and finishes. The beehive-shaped blue ornament in the upper right corner was purchased on eBay as was the small translucent blue ball in the middle of the photo. They are textures on both are really unusual.


The ornaments shown below are mostly newer pieces. The large silver ornaments are mercury glass from Pottery Barn. I wait until they go on sale and then stock up. The Santa was a gift from my husband a few years ago. Even the small red balls (top middle and bottom right) are new. I scored a box of 12 Shiny Brite brand ornaments at Marshall's for $9.99. They really mimic the look of the older ones. The striped ball (bottom left) and the small green ball (bottom middle) are both vintage.


This is another example of how a variety of shapes and colors can work together. There are a few vintage pieces as well as some newer PB ones. I use silver beaded garland to tie things up. It's like jewelry for your tree. I bought four packages at CVS for under $2 each. 


Here's a close up of a large PB mercury glass ornament and a smaller vintage beehive ornament. I love the contrast between these two pieces.


The "Merry Christmas" ornament below (as well as the ornament at the top of this post) have been in my husband's family since the 1950's.  They are two of my favorites.


This is another PB mercury glass ornament. I had a red one like this too, but it ended up smashing on the hearth last year. Unless you have carpet, once these babies start falling, it's all over. 


How fun is this ornament? It was part of a mixed lot I purchased on eBay two years ago. The shape and decoration are really unique.


I found this glass pine cone at Marshall's last year. It's really large. I loved the texture and the opalescence of the glass.


The day after Christmas last year I poked into one of my favorite funky vintage/junk/antique shops (Miss Pixie's). It's one of those places where they have something different and unexpected every time you walk in. I love that. Anyway, they had a big bowl full of vintage ornaments that were half price. This is one that I scooped up.


I had been looking for a tree topper for quite a while. I knew I wanted a spire shape and I wanted it to be vintage and I wanted it to be glass and I wanted it to be red, silver, and gold. Hey, at least I wasn't being too picky...Anyway, found the perfect one on Etsy last year. Just what I wanted.


So here are some tips for creating this look:
  1. Keep your eyes open for older ornaments. Great sources are consignment shops, thrift stores, eBay, and Etsy. Even better, ask older members of your family. You never know what's stashed in someone's attic.
  2. Don't pay too much. I find that when someone is selling a single ornament, the price tends to be higher than when there are several pieces being sold as a lot. Unless you're trying to amass a valuable collection as an investment, there are plenty of great vintage pieces for $1 or $2. 
  3. Shop right after Christmas. This is when things really get marked down.
  4. Mix your old pieces with newer finds. Marshall's, Home Goods, Pottery Barn, West Elm are good hunting grounds. Mercury glass ornaments, in particular, work very well with vintage pieces. Also, keep your eyes open for pre-Christmas sales. PB had all their ornaments on sale for 30% off last week.
  5. Beaded garland looks great with vintage ornaments. Although it comes in several colors, I think the silver really sets it off. It's cheap and readily available.
  6. Don't be afraid to mix colors, textures, sizes, and shapes. Although the traditional advice is to put big ornaments lower on the tree and smaller ornaments higher up, I think it looks better to mix it up a little. 
  7. While you're building your collection, fill in with simple glass balls in a color you like. As long as you stick with glass, it will all look great together.

Merry Christmas, everyone! Enjoy the hunt.

© Salt Marsh Cottage 2013

Tuesday, November 26, 2013

A Touch of Gray


The weathered shingles of a Nantucket cottage. Pebbles on a beach. The ocean at dawn. Gray is a classic, but sometimes overlooked coastal color. Gray can be sophisticated or casual, warm or cool, shy or assertive. There are true grays, greenish grays, blueish grays, and taupe-y grays. Gray can be so pale that it almost appears white or so deep that it's nearly black. With all this variety, it's easy to find the perfect gray to blend with just about any coastal decor. 

1. Barn Light Electrics wall light; 2. BM Hazy Skies; 3. Horchow sea fan art; 4. West Elm throw; 5. CB2 hurricane; 6. Home Depot marble tile; 7. BM Horizon; 8. Crate & Barrel striped rug; 9. Pottery Barn Sophia dresser

1. BM Wickham Gray; 2. Pottery Barn armchair; 3. CB2 pendant; 4. Crate & Barrel lamp; 5.  Pottery Barn gray banded sisal rug; 6. Ikea basket; 7. Williams & Sonoma shell photography; 8. Pottery Barn towels; 9. BM November Skies

© Salt Marsh Cottage 2013

Thursday, November 21, 2013

Elements of a Coastal Christmas


When some people hear the words "Coastal Christmas," they envision lighthouse-shaped ornaments, starfish lights, and driftwood Christmas trees. I'm proposing a less literal interpretation. My thought is to create an approach to Christmas that harmonizes with coastal decor while avoiding the "theme park" look. I base this strategy on three elements: color, materials, and mood.

Let's start with color. The traditional red and green scheme may not work in a coastal home. Consider creating a color palette that complements the colors in your home by combining shades of blue, green, white, taupe, gray, silver, and/or gold.


Live Love DIY


Shorely Chic


Homestyle Diary


For the Love of a House


Southern Hospitality


BHG

Wisteria


Casa Bella


Luckett's Store


BHG

The second element is materials. Incorporating materials like seashells and driftwood is fine, but coastal decor doesn't have to be limited to those obvious choices. In general, natural materials such as foliage, twigs, fruit, and dried grasses blend well with a coastal look.


Shorely Chic


Serendipity Refined


 Canadian Home Trends


Etsy


Etsy


The Lettered Cottage

The final element is mood. Coastal decor is relaxed, unfussy, and casual. Christmas decor should reflect this, so avoid anything too formal, symmetrical, or rigid.


Nell Hill

Enjoy Your Home


Porcelain Garden


BHG


Source Unknown

© Salt Marsh Cottage 2013