Friday, December 23, 2016

Merry Christmas

But the prettiest sight to see is the holly that will be
On your own front door. 
Sure it's Christmas once more!


Have a very merry Christmas! 


Tuesday, December 20, 2016

Verdigris Christmas Ornaments: Tutorial

Christmas is only a few days away. Am I ready? Nope, not even close. But I did come up with this quick tutorial if you want to give some of your ornaments an upgrade. Several years ago I bought boxes of matte turquoise glass ornaments from Michael's. I wanted my tree to fit the coastal decor of our new home, so color was a good way to start. Since then I've collected more unique ornaments, so every year those turquoise balls look less and less interesting. I found this beautiful ornament in a local store and that gave me the inspiration to give my old ornaments a new look.
My inspiration
 After some experimenting, I came up with a technique that worked well. Even my husband (who initially thought I was crazy when I started pulling ornaments off the tree and painting them) thinks they look pretty awesome. Here's my version:

My DIY version


This is a super-easy project. You might even want to enlist your kids to help. Here's how to do it:

Materials:

  1. Blue or green matte glass ornaments. Mine came from Michael's (they were 60% off as of yesterday). You could also try plastic ornaments if that's what you have on hand. You could use non-matte ornaments too. I'm sure it would probably work just fine.
  2. Craft paints in gray, metallic silver, and metallic rose gold.
  3. Small foam brush.
  4. Small paint sponge.

Directions:
  1. Place dabs of each of the paints on a paper plate.  
  2.  Using the foam brush, dab the gray paint randomly on the ornament. Do not try to cover the entire surface. Just do random sections and don't try to make it look good at this point. Repeat with the silver paint and then the rose gold paint.
  3. Using the sponge, blot the surface of the ornament. Do not blend, just blot.
  4. Go back and add some additional colors to certain areas. I found that adding more gray to some areas really adds depth. A few extra highlights with rose gold really works well too.

And you're done! Go hang it on your tree and enjoy!

Have a Merry Christmas, everyone!


Wednesday, December 7, 2016

Creating a Coastal Christmas Tree

So it's about time I got around to Christmas! I hate to decorate before Thanksgiving, but then the time seems to go by so fast and all of a sudden, Christmas is 3 weeks away! Yikes!

Today I thought I'd show you my Christmas Tree and talk a bit about how I put it together. I tried to take pictures while I was doing the decorating, but as usual, I got caught up in the process and didn't take as many pics as I should have. For some more ideas, you might want to check out this post on the elements of a coastal Christmas.


Here are tips for creating this look:

1. The basics: I used a 7.5 foot pre lit tree with white lights. Then I added a gray-washed basket tree collar.
 
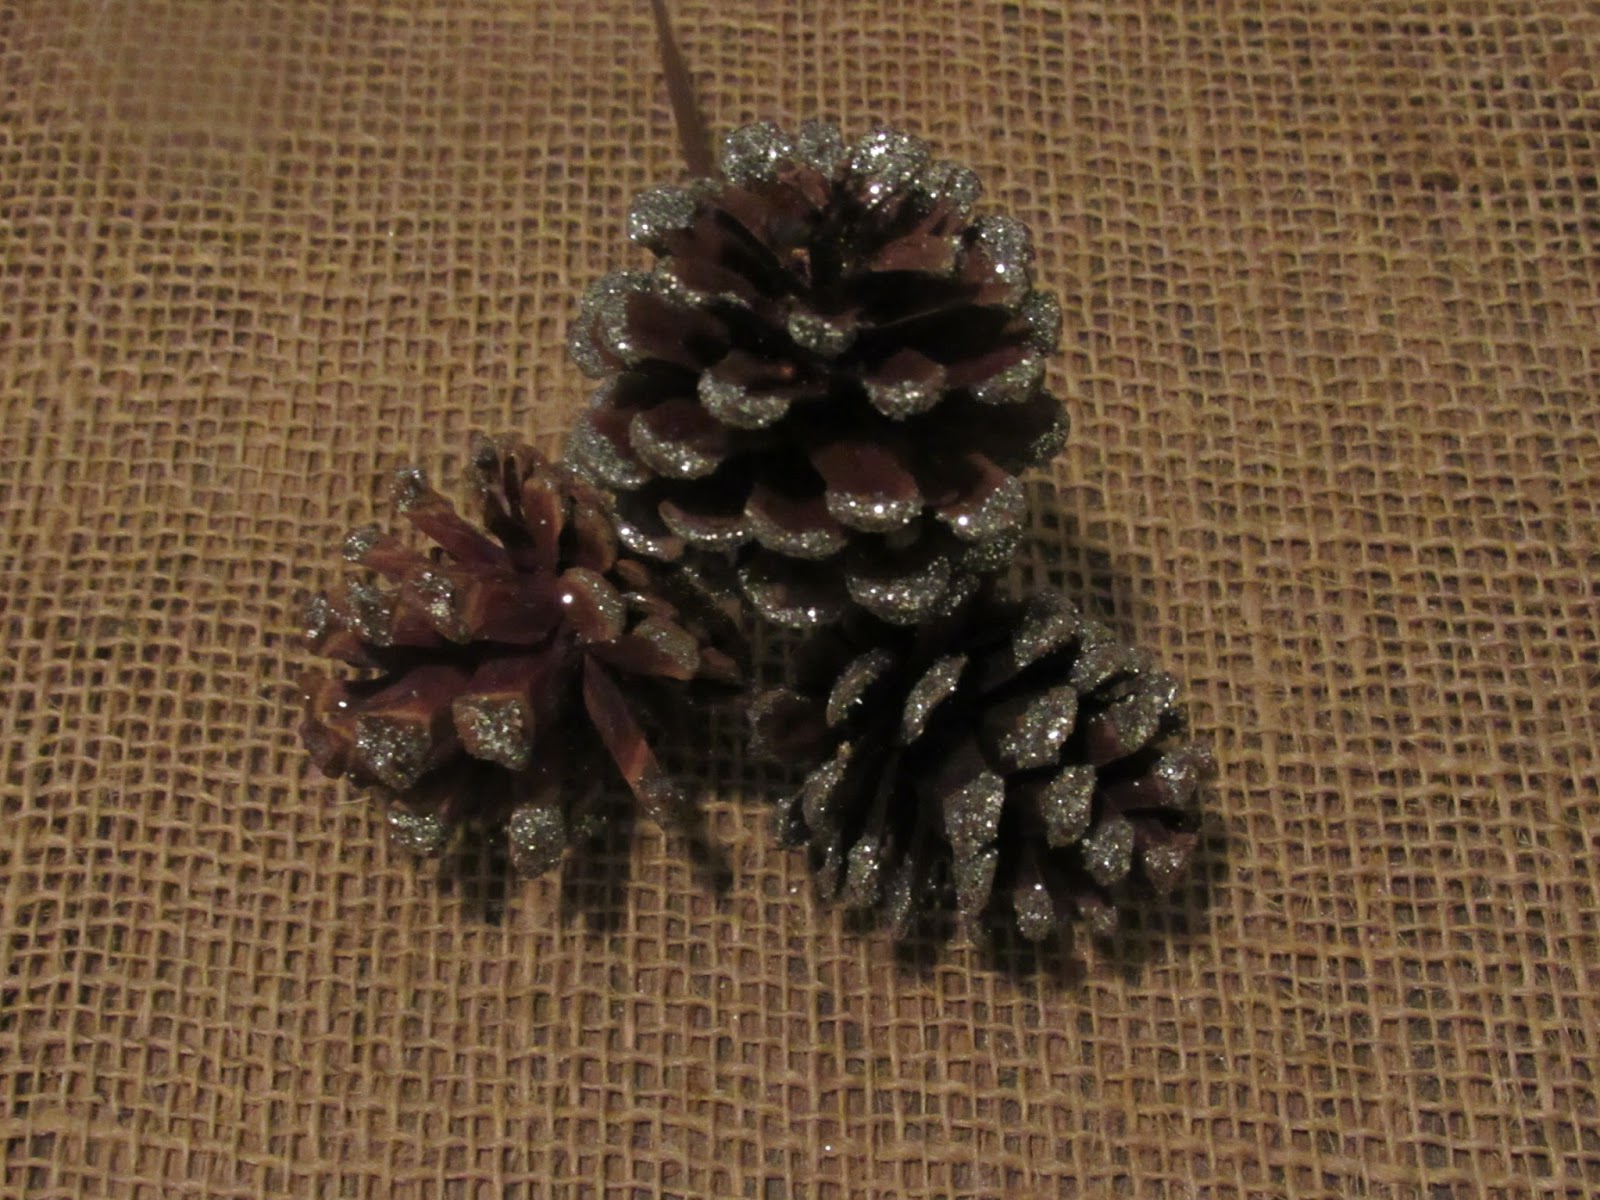
2. I wanted to downplay the "greenness" of the tree. Full disclosure--I would  have preferred a flocked or frosted tree, but I couldn't find one in my price range. Anyway, I purchased 15 frosted pine cone bunches from Michaels. There was a sale so they were 49 cents each. I just wired them on to the branches in random spots, avoiding the lights. They really added a lot of texture.

I also purchased a couple of icy branches at Michaels and deconstructed them into individual twigs. I place those in the tree as well.


The combination of the pine cones and icy branches took the edge off the greenness and made it look much more interesting.

3. Next ornaments. I like to start with the most unique ornaments and arrange them so they can be easily seen. Here are some of my favorites:


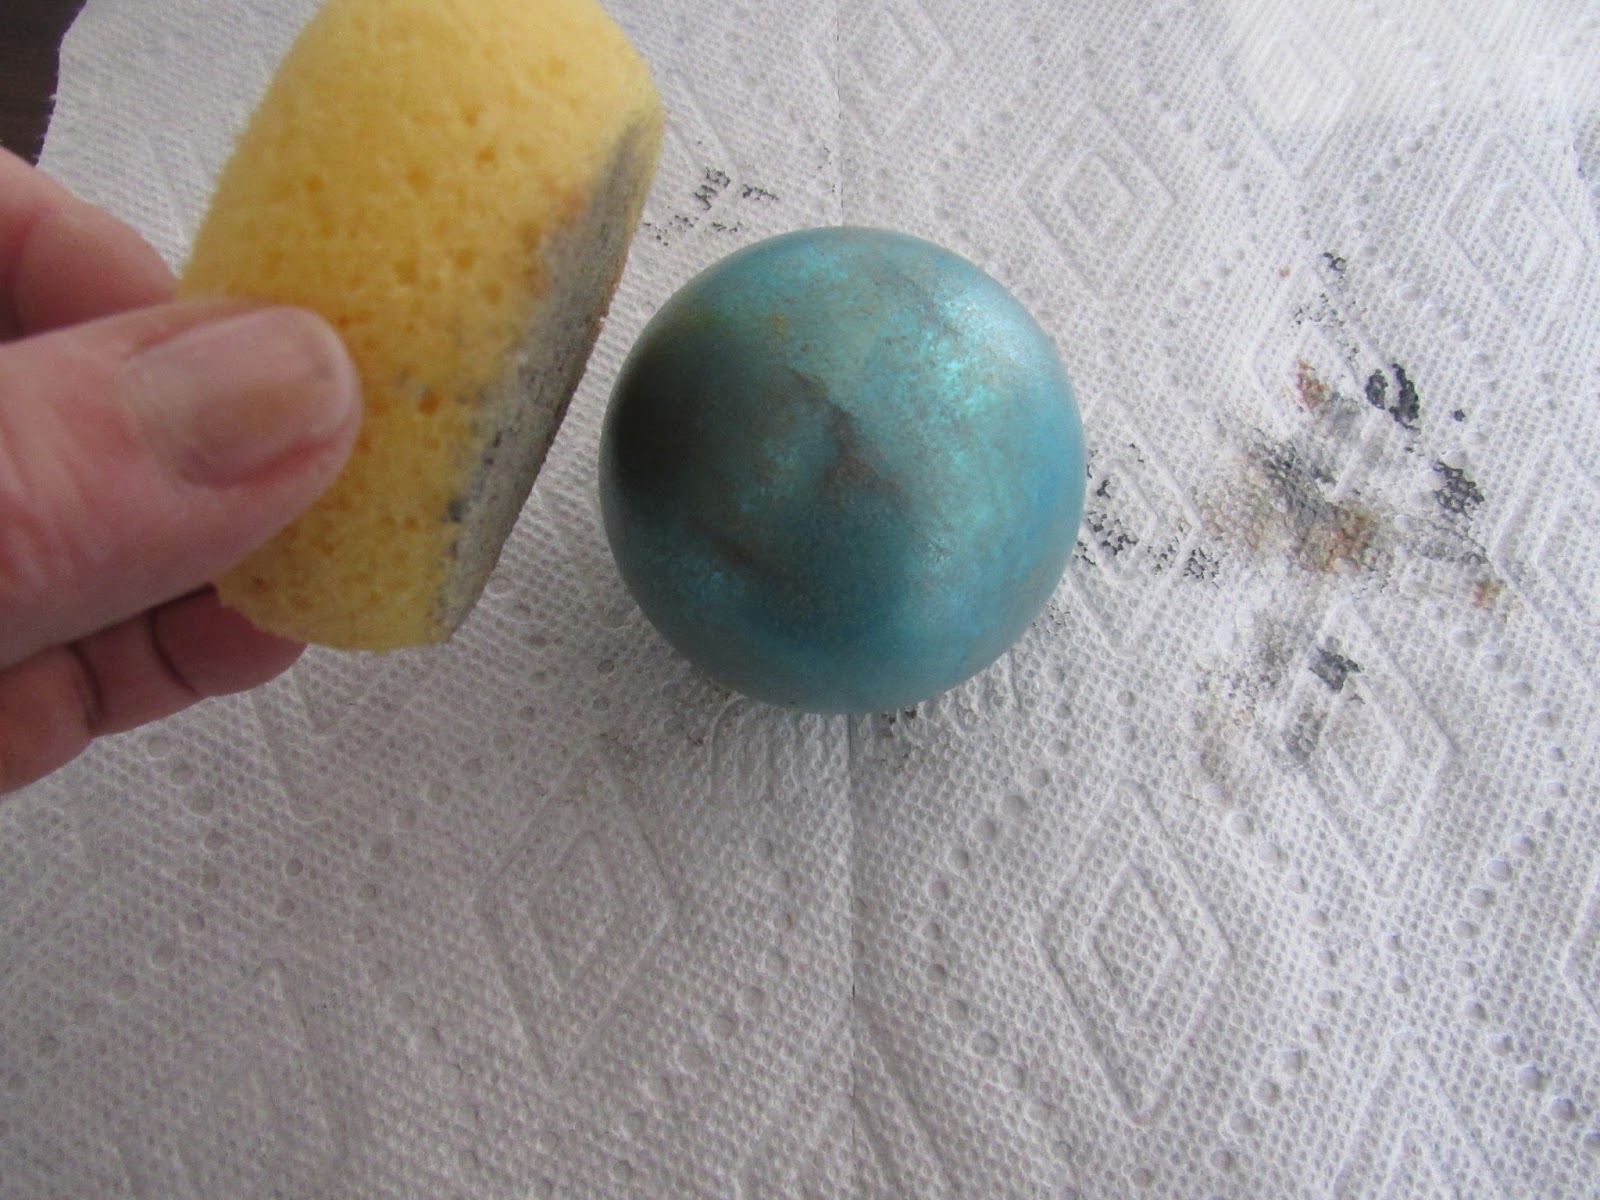
It's fun to collect special ornaments over time, but it's good to have some basic ornaments to set the color scheme. I purchased several boxes of round matte glass ornaments in aqua and in white, some mercury glass ornaments, and some frosted glass pine cones. I used these to fill in the tree.


Then I purchased some small starfish from Amazon and hot glued twine loops on the back. Simple!


4. For the tree topper, I used a large resin star fish. I just lashed it to the top of the tree with some twine.

And here's one more look at the finished tree!


Wednesday, November 30, 2016

Fall Mantel

Since today is the last day of November, I wanted to share my fall mantel before we all move on to Christmas.


Most of this decor is there year around. Starting on the left, there's a wire candle holder from Home Goods and a metal whale made from discarded oil barrels that came from Simple Pleasures in Charlestown, RI. On the right side is a beautiful shell that was a gift from a friend, an old fishing creel that I got years ago at Brimfield, and a vase from Home Goods that I filled with beach stones and some dried grasses. The print is from Pottery Barn.  For fall I added the three white pumpkins, a garland of off-white berries and this string of shell lights. 


Sunday, November 27, 2016

Free Nautical Chart Prints

Nautical charts make great decor and gifts. In addition to framing them to display on a wall, they can be used as wallpaper, decoupaged on furniture, or even used as gift wrap. You can create a large framed nautical chart showing your favorite piece of coast line for very little money. In fact, the chart itself is free online from the National Oceanic and Atmospheric Administration (NOAA). Here's how to get your own nautical chart.

1. Go to http://www.charts.noaa.gov/InteractiveCatalog/nrnc.shtml Click the tab “Paper Charts (RNC & PDF).”


 2. Click on the map to select the area you’re interested in and zoom in. You’ll begin to see an overlay of rectangular shapes. Each shape represents of different chart. Highlight the one you want which will make the outline turn yellow.


3.  Now look at the bottom right side of the page. You’ll see a list of the charts for that area in the gray boxes.


4. Click on the one you want (usually you’ll want the first one listed), then click “PDF” and download your chart.

 5. To print, go to Staples Copy Center and upload your pdf. You can get a 48” x 36” engineering print in color for about $12 or a 36" x 24" for $9.Then you can either pick it up at the store in a few hours or have it mailed to you.


6. Now you'll need a frame. I find Ikea to be a good source of reasonably priced frames. For example, the 24" x 36" Gunnabo frame from Ikea costs $19.99.


Here's how it looks all put together. This 24" x 36" framed chart cost a total of $29 (printing $9 & frame $20).