So in my last post, I showed you my
version of the Sundance Paintbox Side Table. Today, I'll be giving you the full
tutorial.
To recap--I was inspired by this piece: the Sundance Paintbox Side Table
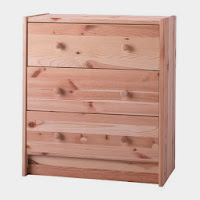
And I decided to try to recreate it using this: the Ikea Rast Dresser.
The inspiration piece has a wonderful rustic look, like it was crafted from random pieces of
reclaimed wood. My idea was to create this impression by treating each piece of
wood differently. Using the unassembled dresser from Ikea made this very easy,
since I was starting with everything in separate pieces.
Materials:
Unassembled "Rast" dresser from
Ikea ($34.99)
Tools for distressing wood (I used a meat
tenderizing mallet, a hammer, and a phillips screw driver)
Wood stain in a dark brown color (I used
Varathane Wood Stain in "Espresso")
Paints in 7 different colors (I used my DIY chalk paint--directions are here)
Extra fine sanding block
Rags for distressing
Belt sander (optional)
Paste wax (I used Minwax)
Dark Wax (I used Breewax in Light Brown)
6 drawer pulls or knobs
Step 1: Distress the wood.
The Rast dresser is made of soft
unfinished pine, which makes it very easy to distress. When the dresser is
assembled, there are 7 surfaces that are visible: 3 drawer fronts, 2 sides,
top, and the kick plate. Lay out these pieces with the visible side up. These
are the pieces you will want to distress.
Using whatever tools you like (my favorite
was the meet tenderizing mallet), beat the heck out of the wood. Try to use an
irregular pattern and group the distressed areas together rather than spreading
them out over the entire piece of wood. Because I wanted the finished piece to
look like it was made out of reclaimed boards, I wanted each piece of wood to
look different. So I tried to use a different pattern and type of distress
marks on each one. This is the kick plate after I finished distressing it.
If you are planning to use drawer pulls
rather than knobs, this would be a good time to fill the predrilled holes with
wood putty and sand smooth. Unfortunately, this did not occur to me until MUCH
later in the process.
Step 2: Staining
Using dark brown wood stain, cover all the
surfaces of all the pieces (including those you didn't distress). You won't
want to see any bare wood inside the drawers when you're finished. Wipe down
and let dry. Since I was doing this in my garage and it was pretty cold out, it
took about 2 days to fully dry.
Step 3: Paint
This is the fun part! Again, because I
wanted each piece of wood to look different, not only did I use a different
color, I tried to use a different paint technique as well. I used a damp rag to
distress as I went along. By pulling off some of the paint, the dark wood is
exposed. I varied the amount of distressing and the number of coats of paint on
each piece. I just kept working until I was satisfied with the results. For
some of the pieces, I used the belt sander to sand through the paint in some
areas when it had dried. I topped off most of the pieces with a gray wash to
further soften the color and I used dark wax in a few areas.
Here are all the pieces laid out followed by a description of the
colors and techniques I used for each piece.
On the far left is the right side panel. I used Benjamin Moore Ash
Blue mixed with a dark gray. I put on several light coats, pulling off color in
some areas with the rag and adding additional coats to other areas. I topped it
with a gray wash and some dark wax.
On the far right is the left side panel.
The paint color is BM Harrisburg Green with some added dark gray. I did heavy
distressing in some areas, used the belt sander in spots, and finished with a
gray wash.
Middle top is the dresser top. The color
is BM Silver Marlin with added dark gray. I did several coats in the center,
leaving the edges bare in spots. Then I used a damp rag to soften the edges.
Second from the top is the top drawer
front. The color is BM Guilford Green. Just slopped it on carelessly, using 3
coats.
Third from the top is the bottom drawer
front. It had one coat of BM Caribbean Blue Water all over. A second coat in
the middle. Heavy use of the belt sander. Gray wash on top. Dark wax in spots.
Fourth from the top is the middle drawer
front. I used the leftover paint from the Ballard Design Console make over (a light blueish
gray). One very thin coat. A second coat, pulling off paint with a damp rag.
Sanded through with the belt sander. A final coat of paint used as a wash. Dark
wax in spots.
Last is the kick plate. I used left over
paint from the Maine Cottage Dresser Knock Off with some dark gray
mixed in. Using a damp rag, I removed paint down to the wood surface, topped it
with a gray wash, and finished with some dark wax in spots.
Step 4: Wax
I finished each piece with a coat of paste
wax. This is SO much easier to do when you're dealing with pieces of wood
rather than a finished piece of furniture. I used a brush to spread the wax all
over the painted surface and then buffed it with an extra fine sanding block.
Step 5: Assemble
Prior to assembling, you may want to drill
holes for the hardware if you are not going to use the existing holes. This is
another thing I did not think to do ahead of time...
In any case, assemble the Rast according
the instructions.
Step 6: Add hardware.
As noted above, I failed to consider this
ahead of time. Once I saw the piece assembled, I decided I wanted to use pulls
rather than knobs, but I was stuck with the predrilled holes that I hadn't
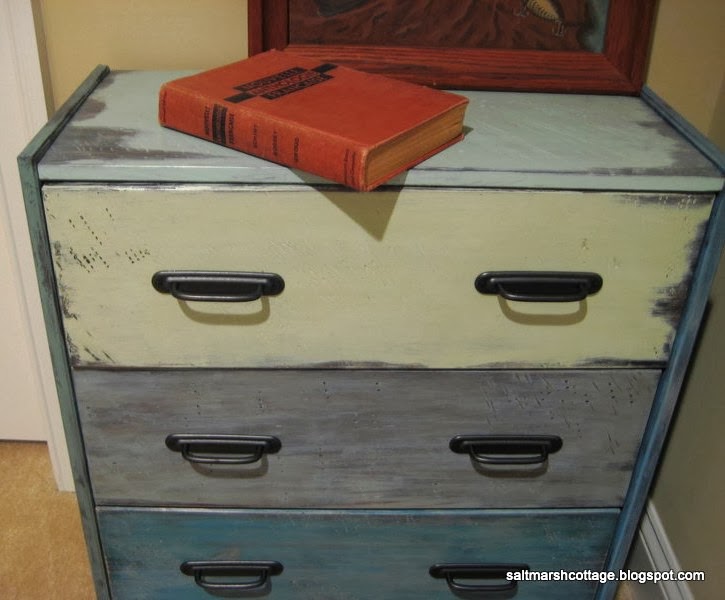
dealt with earlier in the process. By a stroke of luck, I found these pulls at
Target ($25.99 for 6) that had a back plate that covered the extra holes. They
are a "soft iron" color and perfectly rustic-looking without being
over the top.
And here's the finished product! I was a really fun project to do.
I loved trying out different paint techniques and seeing the results. This is a
great project to do if you're not great at painting, because it's virtually
impossible to mess up. If you don't like something, just paint over it. Hope
you enjoyed this tutorial!
© Salt Marsh
Cottage 2014


