Gallery walls--i.e. using a collection of objects and artwork grouped together to cover a large area--continue to be a popular trend. And for good reason! It gives small pieces that would otherwise get lost or go unnoticed, the chance to have a big impact. Gallery walls also allow you to collect pieces over time rather than spending a fortune on one large piece. You can always add additional pieces or rotate pieces in and out of the grouping. It's a unique and personal way to decorate your walls.
I created this gallery wall to go over the sofa in our family room. I was able to incorporate a number of pieces I collected over time from thrift shops, flea markets, and online merchants. I had most of the pieces framed at Michael's during a 50% off sale. There's a lot of wall space in this room, so I'll be able to expand my collection if I find new pieces I like. If you want to create your own gallery wall, read on.
How to Create Your Own Gallery Wall
1. Determine overall size and shape of the space. In my case, I wanted to create a rectangular shape to go over the sofa with a maximum size of 76" wide and 36" high. On a stairway, you might want to use a triangular shape or maybe a diamond shape over a fireplace. Pretty much anything goes.
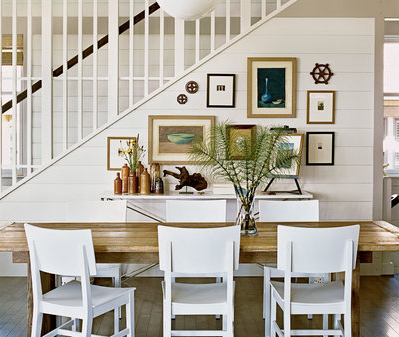
2. Decide on a unifying theme for your display. This gives your grouping a common ground so your arrangement looks intentional, not random. You can choose a theme based on subject matter, color, or size, Another way to unify your grouping is to frame everything the same way. I decided to go with vintage sea life prints. Other ideas include family photos, black and white prints, ocean related art, boats, blue pieces, sea shells, maps, nature, etc. You are not limited to framed art--consider including flat baskets, typeface, found objects, clocks, old signs, mirrors, lanterns, trays, etc. In the photo below from
New England Home, block and tackle pulleys make an eye-catching display on a stairway.
 |
| New England Home |
3. Collect the pieces you want to use. You may have too few or too many. That's okay for now. Find a clear area of floor to work on. Piece together newspaper or something similar to create a template of the exact size and shape of your grouping. Now start placing your items on the template to get a pleasing arrangement. In my case, I had one large piece (34" x 28") and four smaller pieces (approximately 14" x 17"). I ended up using the large piece in the middle and arranging two small pieces on each side. One of my smaller prints is vertical while the other three are horizontal, so I had to work with that. The bottom line is, you want everything to fit inside your template and to have more or less equal spacing between the individual pieces.
 |
| Pinterest (source unknown) |
4. Now figure out if you have to add or subtract any pieces. If you have gaps, think about the size and shape of the object you need to fill that space. Shop your house--maybe you already have something that will work.
 |
| Pottery Barn |
5. Once you have your arrangement worked out, use a broad felt tip pen to outline the objects on your template. Now remove the artwork and with painters tape, attach your template to the wall. Then just hang each piece of art so it fits in its outline on the template. Once everything is in place, simply detach the template from the wall. Now, step back and enjoy your gallery wall.


No comments:
Post a Comment